Guide 01 · Honda
Honda Prelude H22 / H23 — USDM to JDM Distributor Wiring
The car in this write-up is a 2001 Honda Prelude (BB6 chassis). When you swap in a JDM H22 with a distributor that has an internal coil, a couple of wiring changes have to be made to the harness. On US-spec H22s the TDC and CKP signals are read off the crank in the timing-belt casing — so to feed those signals into the JDM distributor instead, follow the steps below. There are two ways to approach the swap overall:
Option A
Change to an OBDII oil pump, mount the crank sensors on the JDM engine, and use all USDM timing gears and crankshaft pulleys.
Option B — this guide
Wire the JDM distributor (internal coil) into the USDM engine harness, which was originally supplied with an external coil.
- Locate the original coil plug that has no home on the JDM engine — 4 pins, 3 wires (Blk/Yel, Yellow, Green); two are 12ga.
- Cut the plug off and connect the solid Yellow wire to the Black/Yellow wire (solder or crimp) and tape it well — this is power for the ignition system. Cut the green wire back and tape off the end; it isn't used.
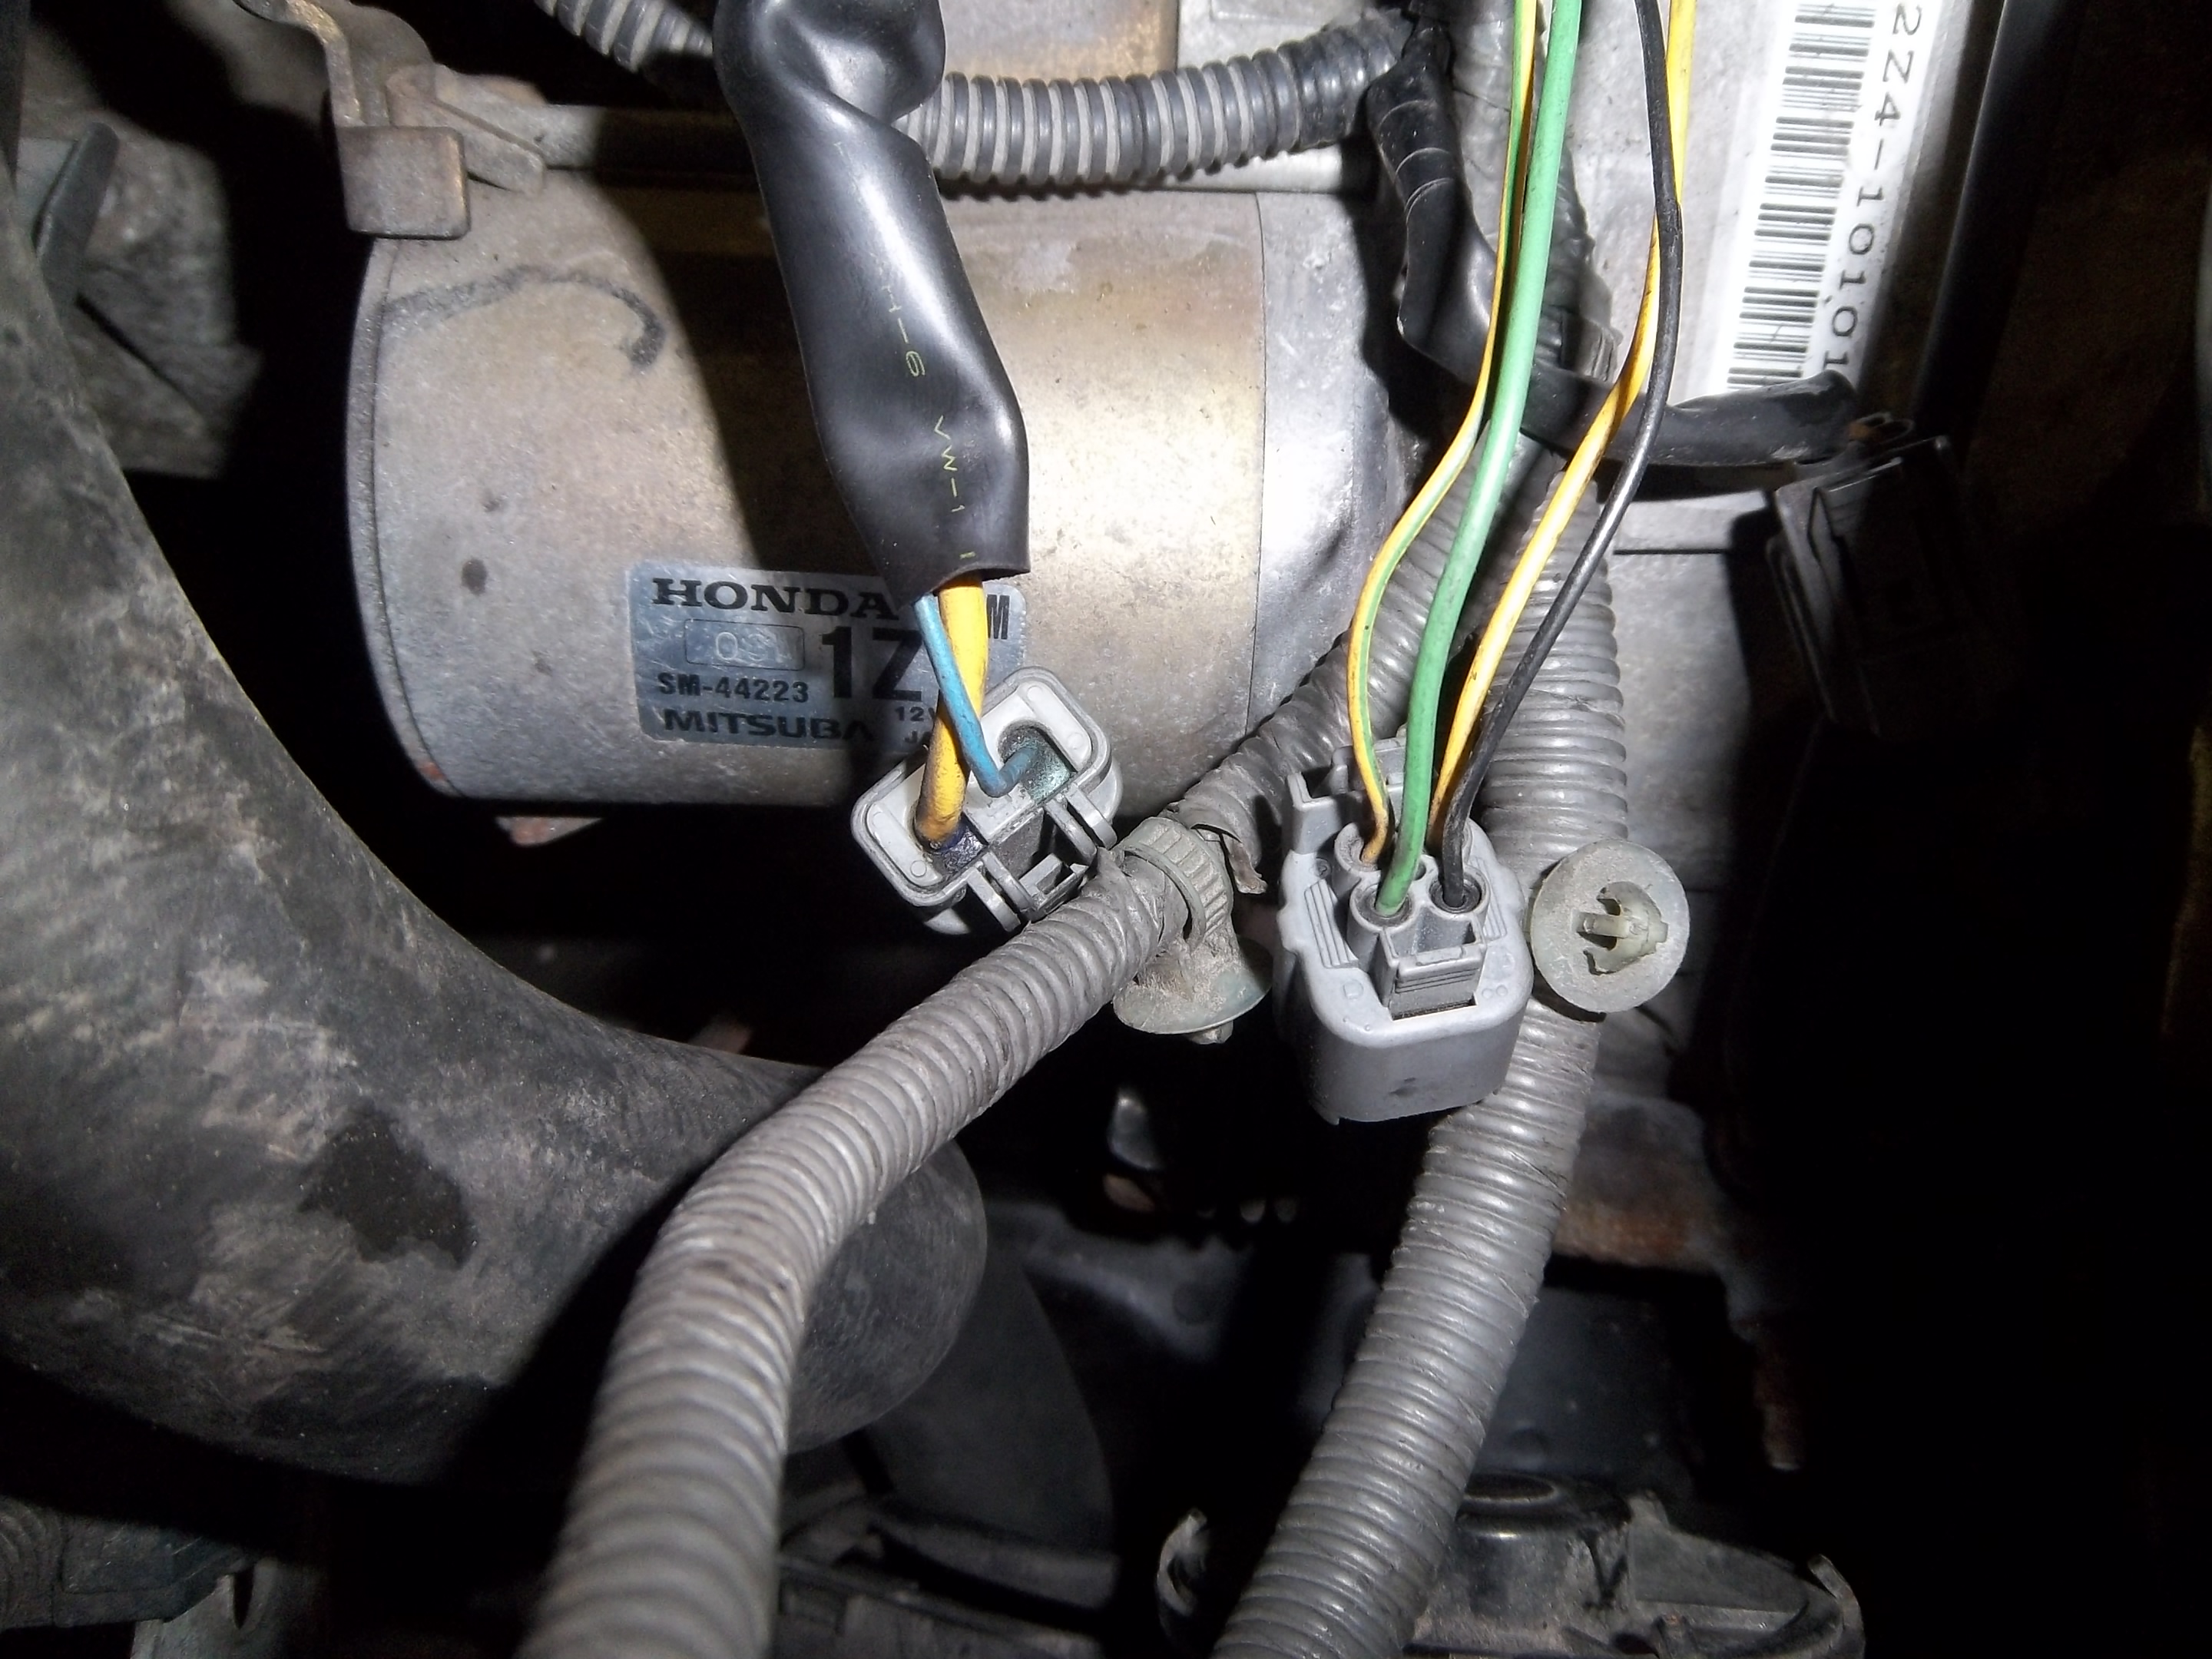
- Locate the two distributor plugs on the USDM engine harness (one 4-pin, one 2-pin). Cut or de-pin all wires in the 4-pin connector, and cut the wires going into the 2-pin connector. Cut the green wire back — not used. (See Picture 1.)
- Locate the female JDM distributor plug from the JDM harness that came with the motor set.
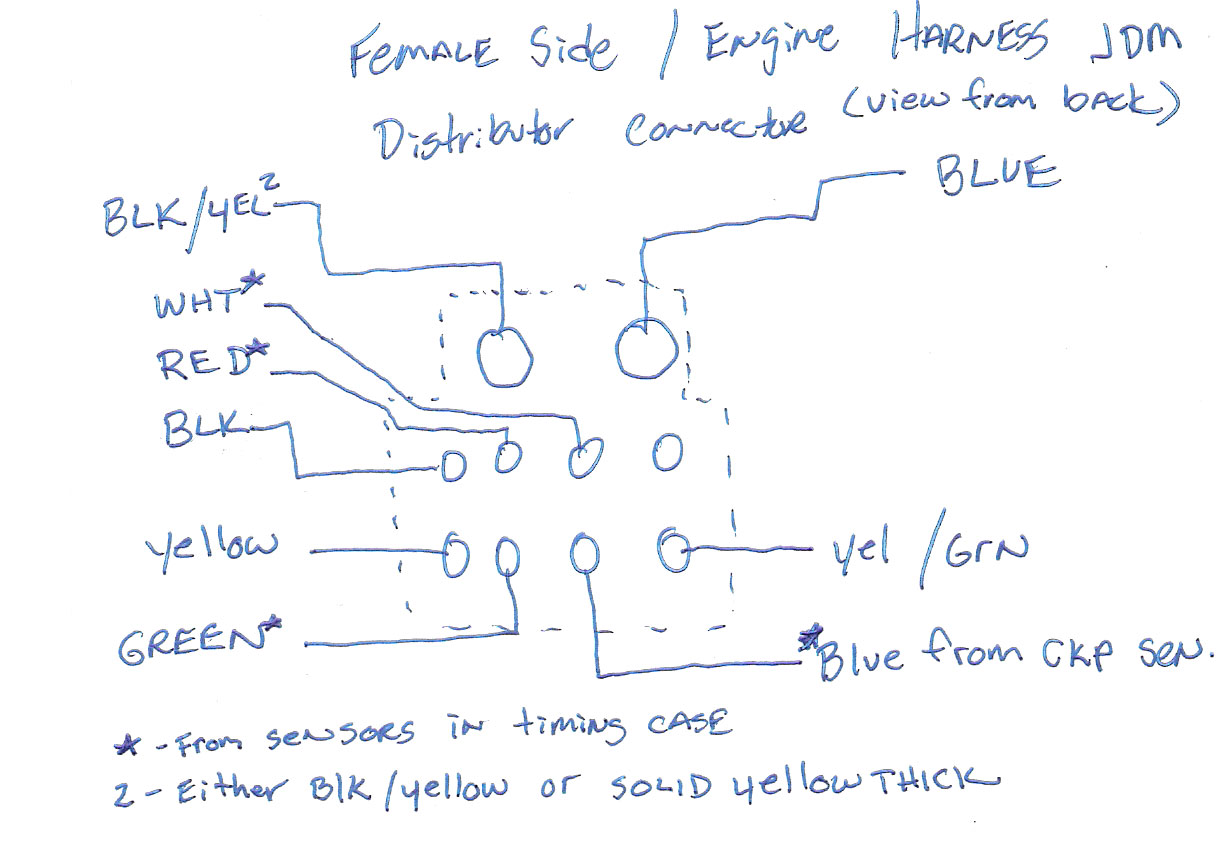
- Insert the pins / connect the USDM-harness wires for the yel/grn, black, and Yellow wire into their corresponding spots, per the picture and diagram.
- Connect the small blue wire and the 10ga Blk/Yel wire into the two spots on the female JDM connector as shown.
- Cut the wiring that runs into the timing case on the USDM H22 for the TDC and CKP signals — four wires that plug in near the alternator (green, red, blue, white). Extend all four about 12 inches so they reach the JDM distributor plug. Use matching wire colors to keep it from getting confusing.
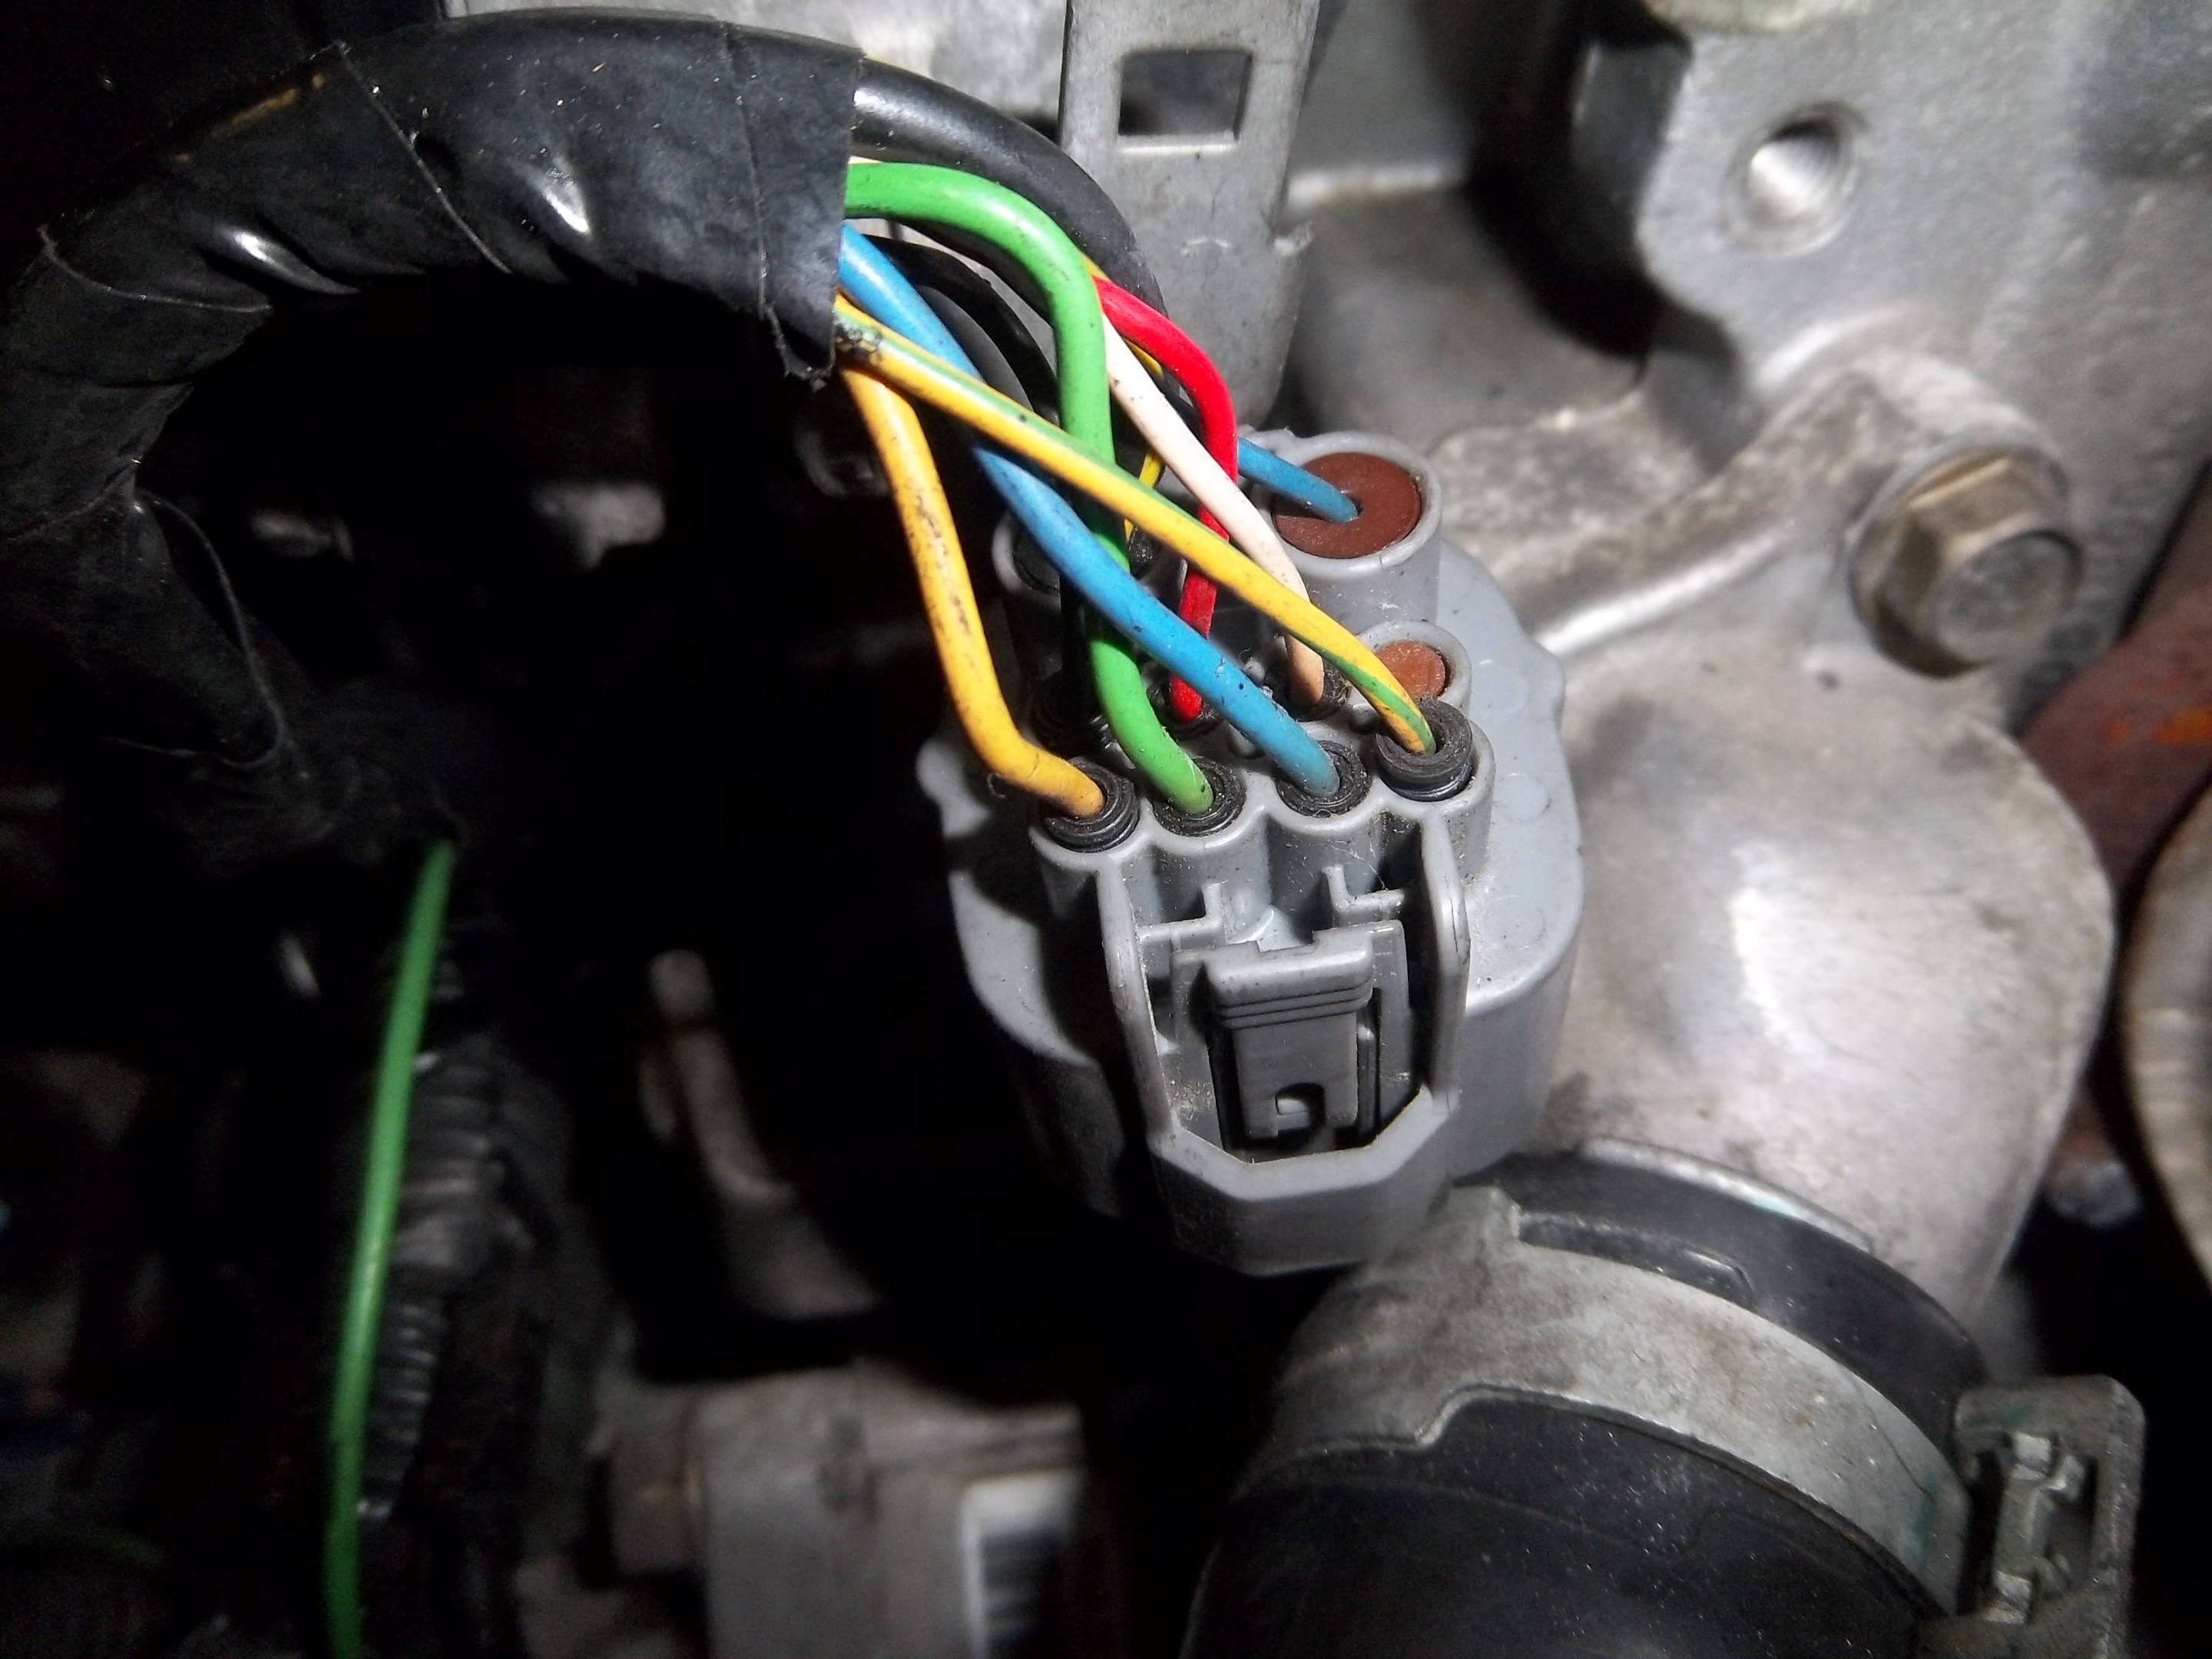
- Connect those four TDC/CKP wires (green, red, blue, white) to the female JDM distributor plug as shown. Some JDM harnesses already have the exact colors coming out of the plug.
- Once everything's wired, the female distributor plug (from the JDM harness) should look like Picture 2. Plug it into the distributor and you're done. Note: the wires coming directly out of the JDM distributor casing won't match the colors shown in the pictures.